Odoo is a leading suite of business applications and one of the fastest growing software vendors in the world. Odoo have many useful modules such as Customer Relationship Management (CRM), Point of Sale, Project Management, Inventory Management, Invoicing, Accounting, E-commerce, and much more.
There are many ways to install Odoo in Ubuntu Linux depending on the requirements you can install Odoo using APT repositories, docker compose, or Git repository.
This article is explain installation and configuration of Odoo using Git source and Python environment on an Ubuntu 20.04 LTS and for Nginx web server as the reverse proxy.
Steps to Install Odoo 15 in Ubuntu Server
Step - 1 : Update Server
    sudo apt-get update
    sudo apt-get upgrade
Step - 2 : Create Odoo User
sudo adduser -system -home=/opt/odoo -group odoo
Step - 3 : Install PostgreSQL Server
    sudo apt-get install postgresql -y
    sudo su postgres createuser --createdb --username postgres --no-createrole --no-superuser --pwprompt odoo15
Step - 4 : Install Python Dependencies
Install pip3
sudo apt-get install -y python3-pip
Install package and dependencies
    sudo apt-get install python-dev python3-dev
    libxml2-dev libxslt1-dev zlib1g-dev libsasl2-dev libldap2-dev build-essential
    libssl-dev libffi-dev libmysqlclient-dev libjpeg-dev libpq-dev libjpeg8-dev
    liblcms2-dev libblas-dev libatlas-base-dev
sudo apt-get install libpq-dev python3-dev libxml2-dev libxslt1-dev libldap2-dev libsasl2-dev libffi-dev
sudo apt-get install -y npm
sudo apt-get install -y node-less
sudo apt-get install xfonts-75dpi
Step - 5: Clone Odoo from git repository
Install git
sudo apt-get install git
Clone Project Odoo 15
cd /opt
git clone https://www.github.com/odoo/odoo --depth 1 --branch 15.0 --single-branch
Change ownership of odoo folder:
sudo chown -R odoo:odoo /opt/odoo/*
Step - 6: Install Required Python Packages
All packages required packages is listed on requirement.txt file, to install run this following command:
sudo pip3 install -r /opt/odoo/requirements.txt
    sudo cp /opt/odoo/debian/odoo.conf
    /etc/odoo.conf
Step - 7: Install Wkhtmltopdf
Odoo use Wkhtmltopdf to make pdf report from HTML data format, to install Wkhtmltopdf you need to download it by used this command:
wget https://github.com/wkhtmltopdf/packaging/releases/download/0.12.6-1/wkhtmltox_0.12.6-1.focal_amd64.deb
Then install the .deb file:
sudo apt install ./wkhtmltox_0.12.6-1.focal_amd64.deb
Step - 8: Settup Conf File
The configuration of Odoo like addon path, database connection, port etc is store in odoo.conf file. There are sample conf file that we can use to our installation, wen need to put the conf file into /etc folder:
sudo cp /opt/odoo/debian/odoo.conf /etc/odoo.conf
Here is my conf file for you example:
[options]; This is the password that allows database operations:
admin_passwd = adminPassWzOrddb_host = localhost
db_maxconn = 64db_name = Falsedb_password = odooPassworddb_port = 5432db_sslmode = preferdb_template = template0db_user = odoo15dbfilter =addons_path = /opt/odoo/addonslogfile = /var/log/odoo/odoo.log
Settup Log file:
sudo mkdir /var/log/odoosudo chown odoo:odoo /var/log/odoo
Step - 9: Settup Odoo Service
Create a service file ‘odoo.service’ in /etc/systemd/system:
sudo nano /etc/systemd/system/odoo.service
Add the following content to the newly created service file:
[Unit]
Description=Odoo
Documentation=http://www.odoo.com
[Service]
# Ubuntu/Debian convention:
Type=simpleUser=odoo ExecStart=/opt/odoo/odoo-bin -c /etc/odoo.conf
[Install] WantedBy=default.target
Set the permissions for the root user to this service file:
    sudo chmod 755 /etc/systemd/system/odoo.service
    sudo chown root: /etc/systemd/system/odoo.service
Step - 10: Test Odoo
Set the permissions for the root user to this service file:
sudo systemctl start odoo.service
Then check the status of the service using the following command. And if it depicts as active, the installation of Odoo was successful:
sudo systemctl status odoo.service
Now you can access Odoo from your favorite browser, type the following URL:
“http://localhost:8069”
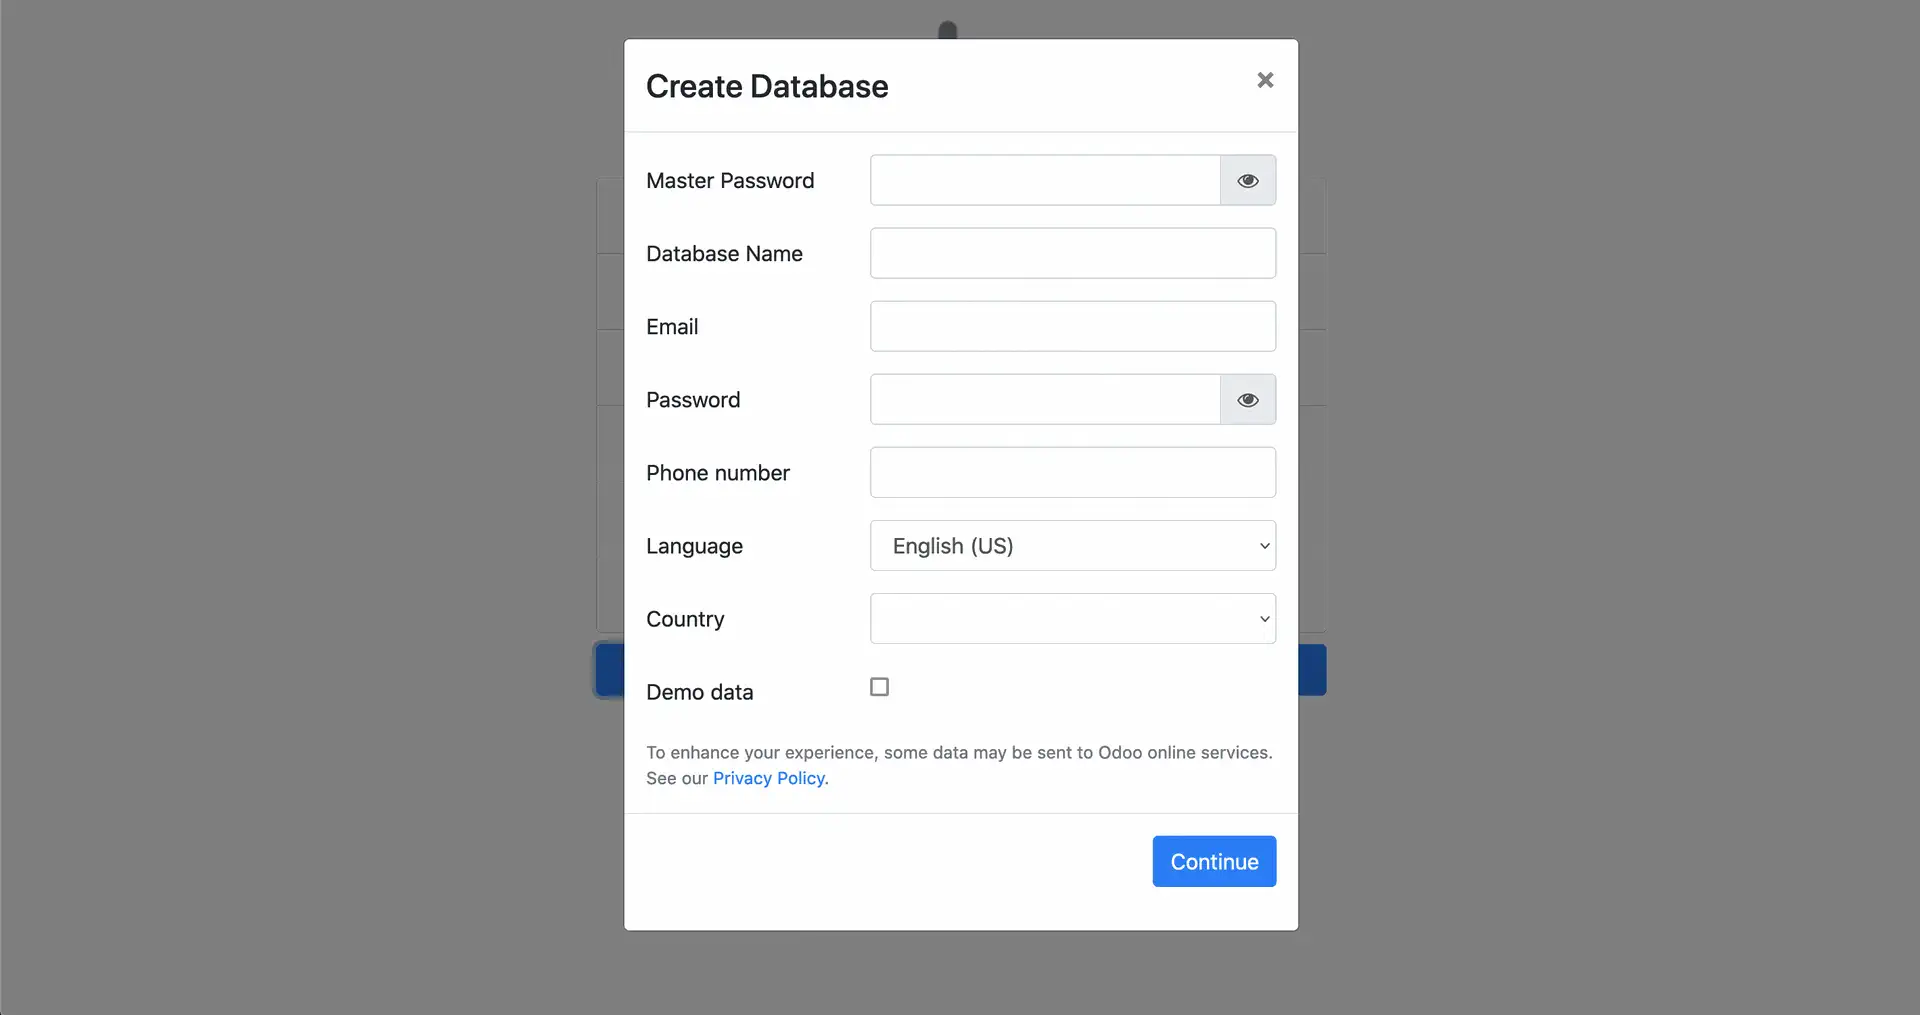
This will redirect you to the database creation page if everything is set up correctly.

*Note: Master Password is admin_passwd that we have set in odoo.conf in previous step.
Nginx as Reverse Proxy Odoo 15
Nginx is a popular webserver that commonly use in production server, we use Nginx as reverse proxy in order to simplify your user to acces Odoo without the Port number in ther URL.
Follow this step to install and configure Nginx as reverse proxy:
Install Nginx:
sudo apt install nginx
Start the Nginx service with the use of the following command:
sudo service nginx start
Then remove the default virtual host’s symlink since we won’t be using it any more:
sudo rm /etc/nginx/sites-enabled/default
Create new Virtual Host configuration:
sudo nano /etc/nginx/sites-available/localhost-proxy
Copy paste this following configuration:
server {
server_name localhost; //replace server name with your domain or ip address
listen 80;
access_log /var/log/nginx/testing-access.log;
error_log /var/log/nginx/testing-error.log;
location / {
proxy_set_header Host $host;
proxy_set_header X-Real-IP $remote_addr;
proxy_pass http://localhost:8069/pembukuan/;
}
}
server {
listen 80;
listen [::]:80;
server_name localhost;
return 301 https://localhost$request_uri;
}
Enable both sites by creating symbolic links to the sites-enabled directory:
sudo ln -s /etc/nginx/sites-available/localhost-proxy /etc/nginx/sites-enabled/localhost-proxy
Test the configuration to ensure there are no errors:
sudo nginx -t
If there are no errors, then restart Nginx:
sudo service nginx restart
Test the reverse proxy by accessing localhost from your browser, you will have Odoo page. You can modified the configuration above with your real domain or IP address in production server.
