1. Introduction
This document explains how to do an auto backup (mysql) database from (Linux) server to Google Drive using rclone.
Why do we need to backup our data?
The answer is because it’s important, yep it’s very important to have backup in anything especially, data. Let’s say “if” something terrible happened to our application in the production, without any backup we’ll take more time & effort to replicate the conditions or to fix the problem, and so on.
Then, why do we need to backup our data in two different places (In our server & Google Drive)?
Then my answer is, to free/save some spaces in the server, it means saving more cost since we have some “free” spaces in Google Drive. In this document, we use rclone as a third party software.
What is rclone? Why rclone?
Rclone is a command line program to manage files on cloud storage. It’s quite popular as a top tool for anyone who uses cloud storage in a business environment, I call it a bridge between our server and our cloud server (Google Drive). It is also available for multiple operating systems such as our (linux), Windows, MacOs & eg. Enough for the intro, let’s get started.
2. Connecting Google Drive to Server
First, we have to set up a connection between our server & Google Drive.
a. Installing rclone:
curl https://rclone.org/install.sh | sudo bash

*Please make sure the installation has finished, and you get a success message.
b. Setting rclone configurations:
rclone config
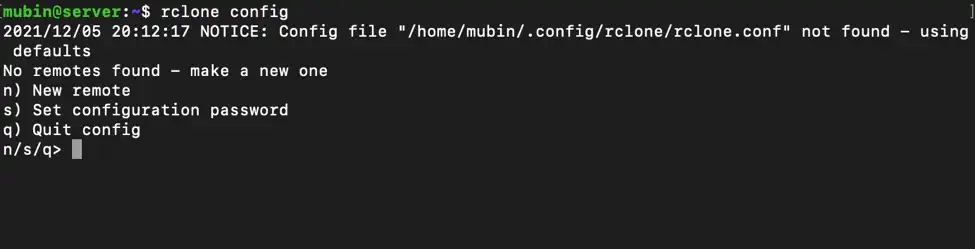
For example we want to create a new connection, press n then enter. After that we need to define a name, let's call it “g-drive” then enter.

After giving a connection name, there will be a list of storages:
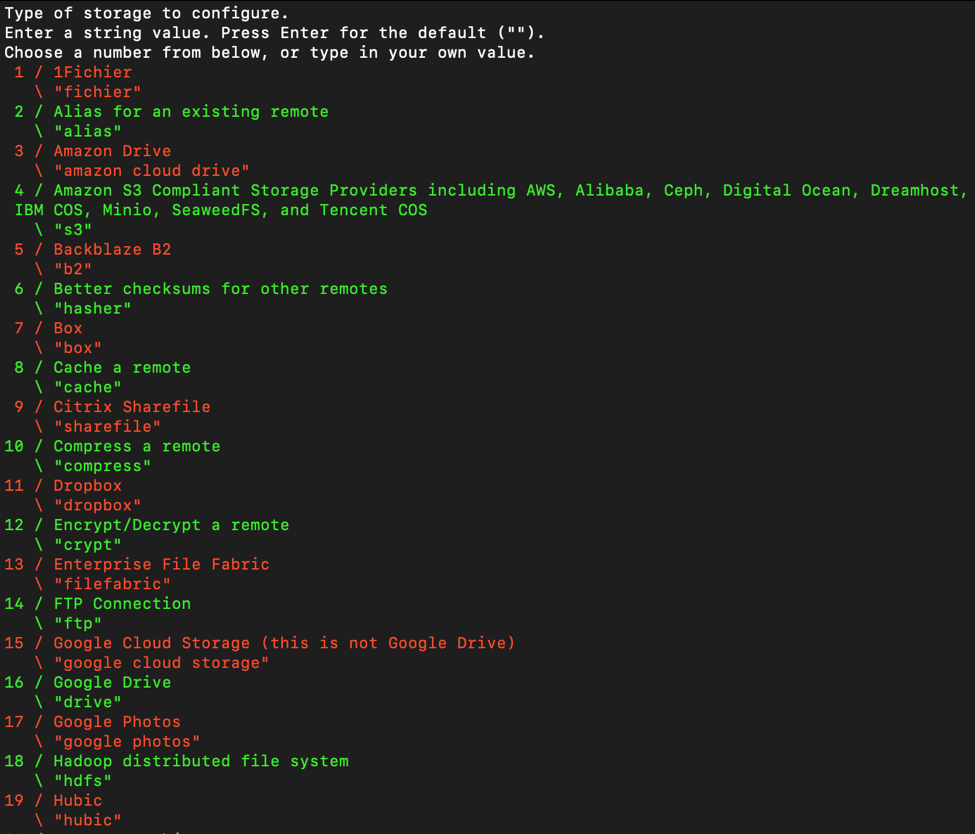
Since we want to use Google Drive, just type 16 then enter. It will ask google drive client id and client secret. Just press enter to accept default.
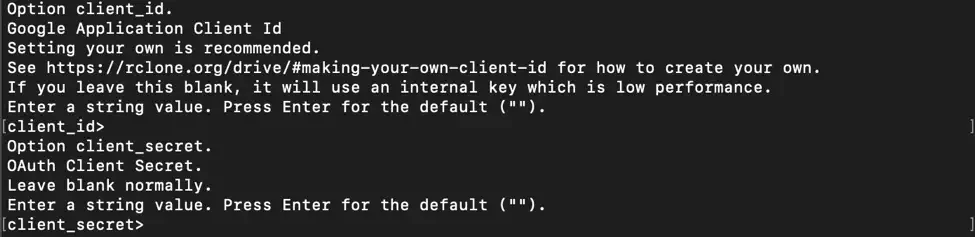
Next step, rclone will ask for permission to access your Google Drive, just type 1 then enter.
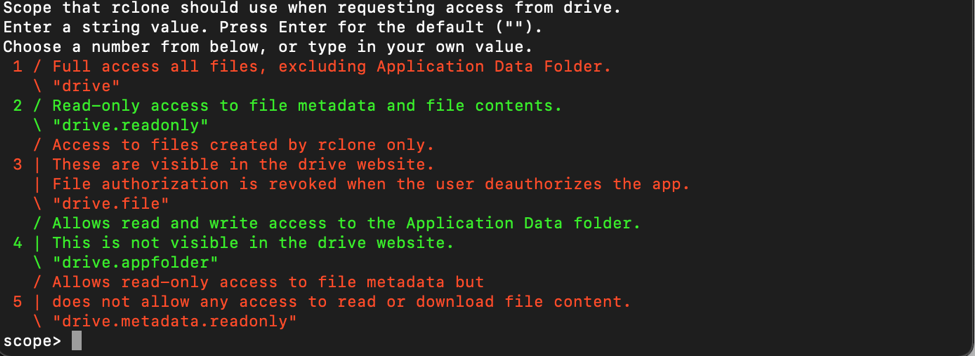
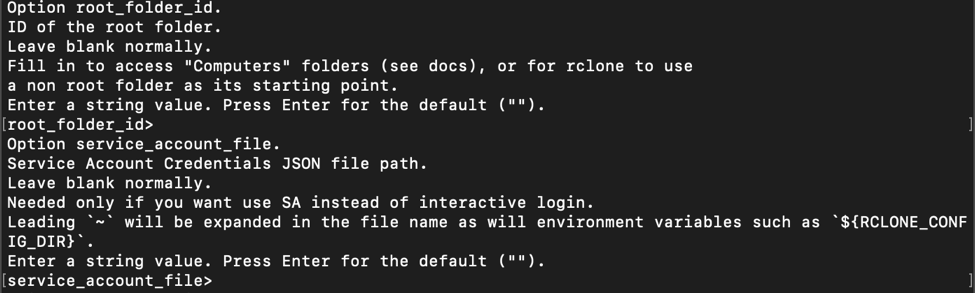
It will ask for root folder id & Service Account Credentials. Just press enter to accept the default.
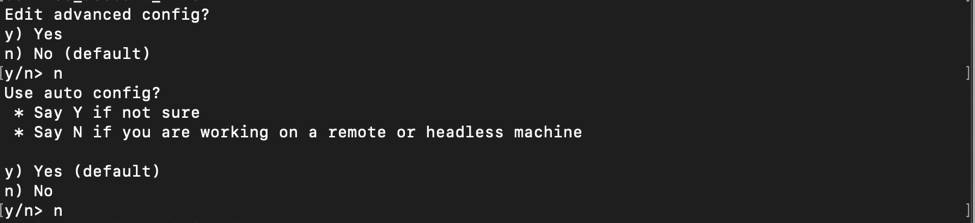
At the “Edit advanced config” prompt, type n or just press enter. At the “Use auto config” menu, press nand then press enter.
After that, you'll get something like this:

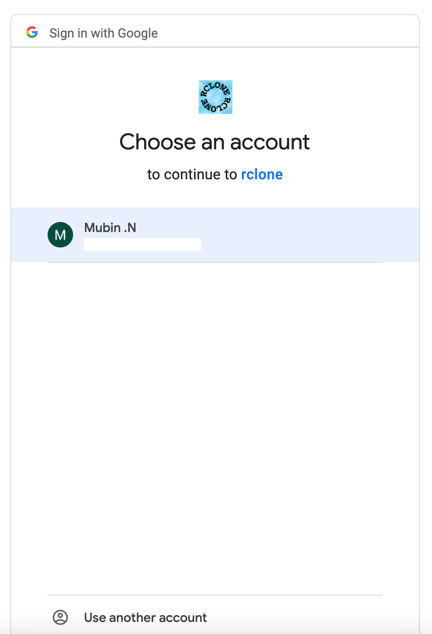
Copy provided link and open in your browser, choose an account to connect, then click Allow:
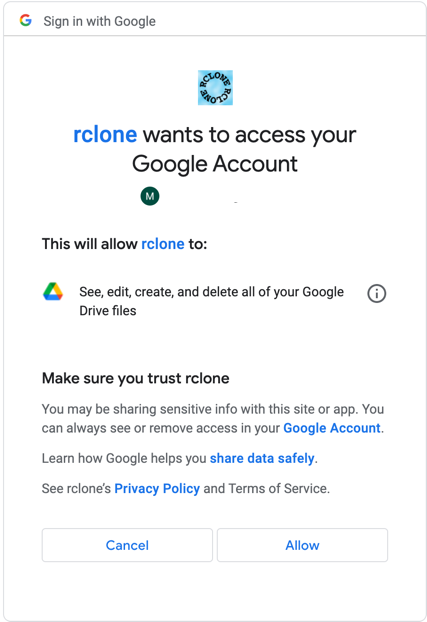
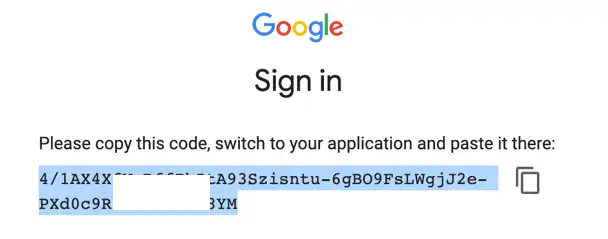
After you click Allow, you’ll have something like this. Copy the verification code and paste it into your terminal then enter:
At the “Configure this as a team drive” prompt, type n and then press enter. At the “Yes, Edit, Delete” menu type y and then press enter.
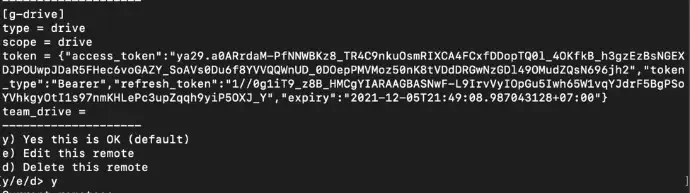
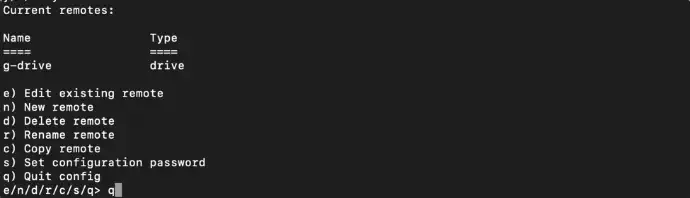
After all this set up, you’ll see something like this. This is the last configuration, just type q to quit.
3. Auto Backup mysql Database (Server & Google Drive)
For now, Google Drive is connected to your server. Next we are going to write a script for auto backup mysql database to Google drive. Use root, and go to / directory.

Create a shell script (.sh) file in the root directory using your favourite editor.
Type: nano backup.sh

Copy this script below into your backup.sh:
#!/bin/bash
##this script will backup mysql and upload it to google drive
##directory name
dirname=$1;
##database name
database=$2;
##database username
dbuser=$3;
##database password
dbpass=$4;
## rclone remote name
rcloneRemoteName=$5;
##google drive folder name
gdrivefoldername=$6;
##condition to check folder exist or not
if [ ! -d "$dirname" ]
then
##create directory
mkdir ./$dirname
##dump mysql database on server
mysqldump -u $dbuser -p$dbpass $database | gzip>"./$dirname/$database($(date +\%Y_\%m_\%d_\%H)).sql.gz"
##wait for 10 seconds
sleep 10
##upload it to google drive
rclone copy "./$dirname/$database($(date +\%Y_\%m_\%d_\%H)).sql.gz" $rcloneRemoteName:$gdrivefoldername
##if folder already exist
else
##dump mysql database on server
mysqldump -u $dbuser -p$dbpass $database | gzip>"./$dirname/$database($(date +\%Y-\%m-\%d-\%H)).sql.gz"
##wait for 10 seconds
sleep 10
##upload it to google drive
rclone copy "./$dirname/$database($(date +\%Y-\%m-\%d-\%H)).sql.gz" $rcloneRemoteName:$gdrivefoldername
##delete 10 days older file on server to save disk space(this command is optional)
find ./$dirname -mtime +10 -type f -delete
fi
exit 0;
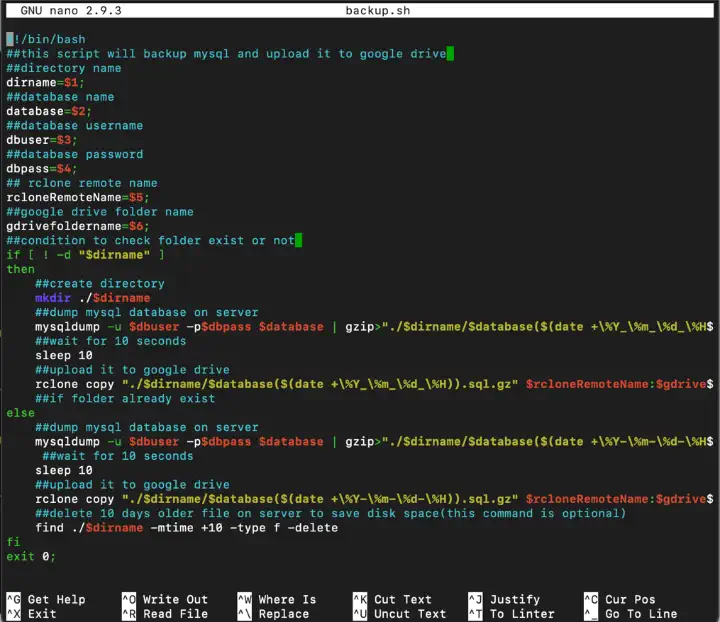
Ref: https://gist.github.com/mahisat/757af810bebc2ac80817bb1c32b87776
Save & exit. Don’t forget to make backup.sh executable by adding a permission.
Type:
chmod +x backup.sh
Since your backup.sh is now executable, let’s test to run the script.
Type:
./backup.sh mysqlbackup test_db root pass123 drive BackupFolder

After executing the command, type “ls” you will find the mysqlbackup folder which you passed as a parameter. Now go to Google drive Check your folder you will find a Backed Up Database inside BackupFolder.
Next step we are going to automate our script using crontab, let’s configure a new job.
Type:
nano /etc/crontab
Then copy this line:
0 0 * * * root /backup.sh mysqlbackup db_name db_user db_password connection_name gdrive_target_folder
db_name: your database name
db_user : your database user
db_password: your database password
connection_name: rclone connection name that you already defined ex: g-drive
gdrive_target_folder: folder to save backup file in Google Drive
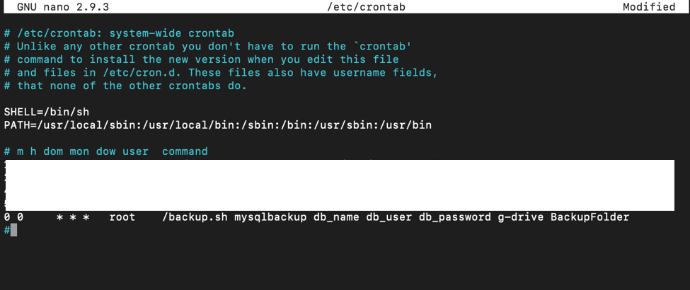
In the above command 0 0 * * * refers to the time when you want to backup sql file to the server. Here 0 0 * * * means everyday backup will be done at 00 AM. Now, you have successfully completed the auto backup MySQL database to Google Drive.
4. Auto Delete old Backup Files
After successfully running auto backup, we’ll discuss how to delete the old backup file? Because the backup job runs every day there will be a lot of backup files, which means it will use more storage on your server. Of Course you don’t want it.
Use:
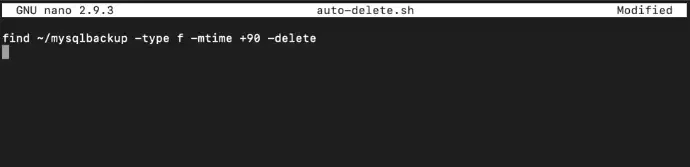
find ~/mysqlbackup -type f -mtime +90 –delete
The command line above is about to delete files inside mysqlbackup which is older than 90 days. Let’s make it auto by adding a new job inside crontab. First, create an executable file.
Type:
nano auto-delete.sh

Copy the command line to delete files (above) into it, then save.
Now, your script is ready. Let’s add a new job into crontab nano/etc/crontab
Use:
0 0 1 * * root /auto-delete.sh
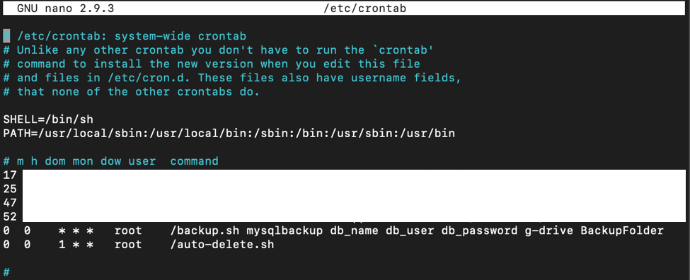
As we can see above, the job to auto delete files is different with auto backup. It’ll run the job every 1st day of the month. Notes, it will only delete backup files inside your server storage, backup files inside your Google Drive will not be affected.
If you want to make the backup files in your server sync with the backup files in Google Drive, there is a way to do so. Using rclone sync, it’s one of rclone's features. How?
rclone sync ~/mysqlbackup connection_name:gdrive_target_folder
Change:
connection_name: your gdrive_target_folder connection that was already created
grdive_target_folder: your Google Drive folder name
You can run the command manually, or automatically after the command line to delete old files. How?
Edit your auto-delete script (auto-delete.sh) file: nano auto-delete.sh
Copy the sync command line above, paste into it and save.
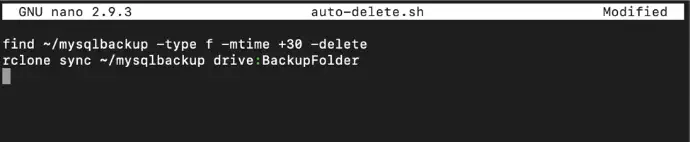
Based on the script above, once crontab jobs run for auto delete file, it will execute two commands.
- Command to delete backup files older than 30days.
- Command to sync your Google Drive Backup with your server backup